


INTRODUCTION:
About VOCat
HOW TO:
Proxy Settings
Parsing a new Catalog
RELEASE:
VOCat is a stand alone tool to create and query MySQL databases. The user can create various views of the database and save them locally. The MySQL database can be present either on the user's machine (localhost) or any web server (vo.iucaa.ernet.in).
Click here for release notes and disclaimer.
VOCat has been developed as a part of the Virtual Observatory - India initiative by Persistent Systems Pvt. Ltd. and the Inter-University Centre for Astronomy and Astrophysics (IUCAA).
Third Party Tools
VOCat uses SAVOT parser for parsing of the VOTable files.
System Requirements
Java : To run VOCat you must have JRE 1.4.2 or higher version
To check version of java on your machine, you can use the following command on the command line
java -version
Mysql: To create databases on local machine you will need MySql 4.1.14 version to be installed on local machine.
To see version of MySQL installed, type following command at the command prompt
mysql
if it prompts to mysql type
status
you will get the information about mysql installed on your machine.
Starting Instructions
Please download the executable jar file named VOCat.jar.
The file can be executed by typing the following command at the command prompt:
java -jar VOCat.jar
This will open a java application window as shown in the Fig. below.
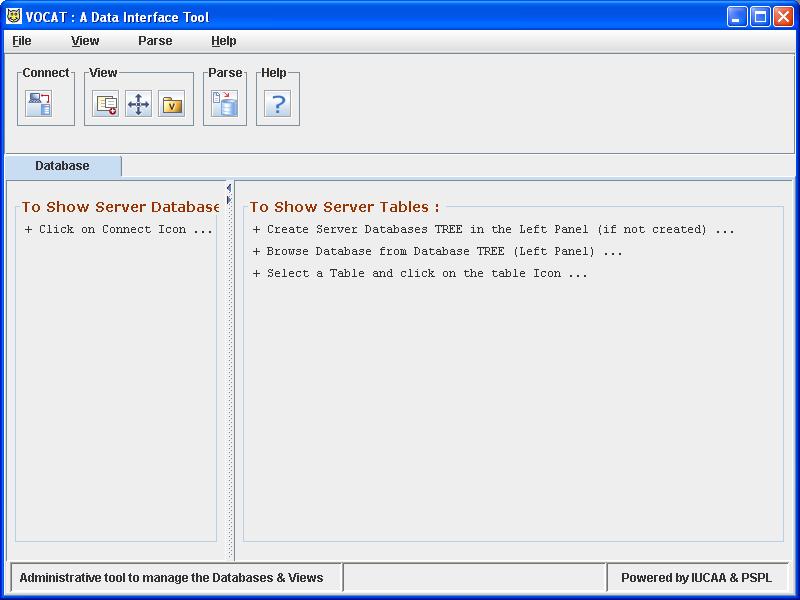
VOCat needs to connect to a
MySQL database first. The MySQL database can
be present either on the user's machine (localhost)
or any web server (vo.iucaa.ernet.in). Press the
connect button
![]() on the toolbar to open settings window.
on the toolbar to open settings window.
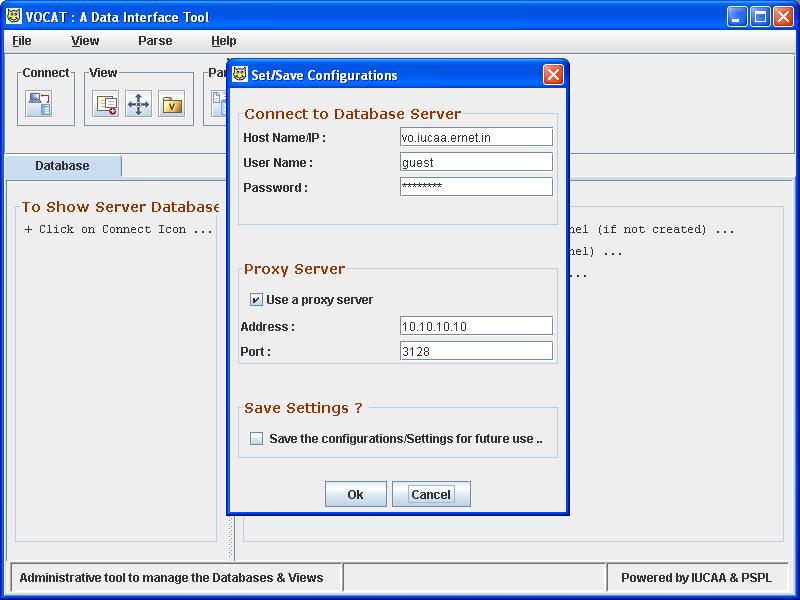
Press Ok.
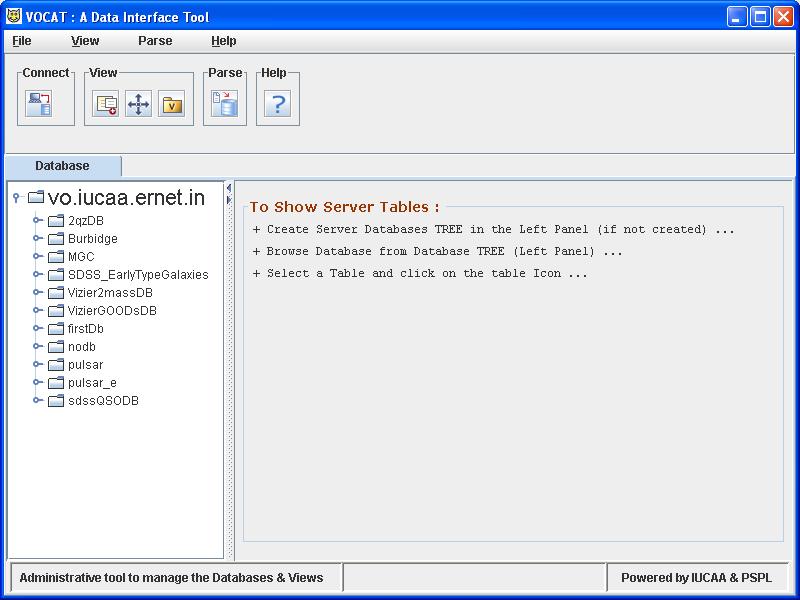
If MySQL server authentication succeeds it will connect to the MySQL server and related databases will be displayed on the left panel.
In some institutes, while connecting to internet, the application has to go through a proxy server. VOCat connects to remote database servers along with VO tools like Aladin, Simbad, Ned, Cone Search etc which require an internet connection. We enable all these internet related operations of VOCat by providing a proxy URL/IP and a proxy port.
Press the connect icon and click on the 'Use a proxy server' checkbox. Then enter the relevant proxy URL/IP and proxy port. Click the 'Save settings for future use' checkbox. Press Ok to continue. Your proxy information is saved on your local disk and will be available to you when you will launch VOCat in future.

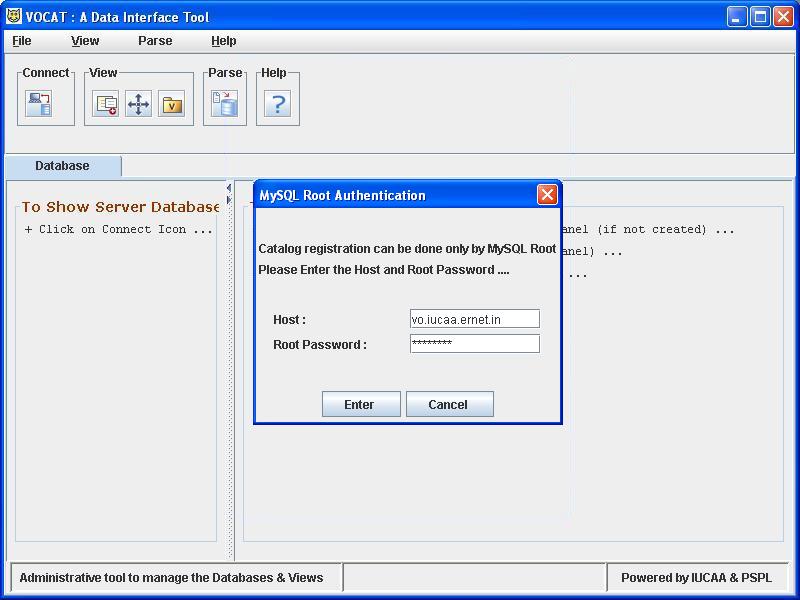
Here user needs to connect to the MySQL server in which one wishes to create database.
Enter Host MySQL server and root password (if Any)
Select either ASCII or VOTable file type as input data file.
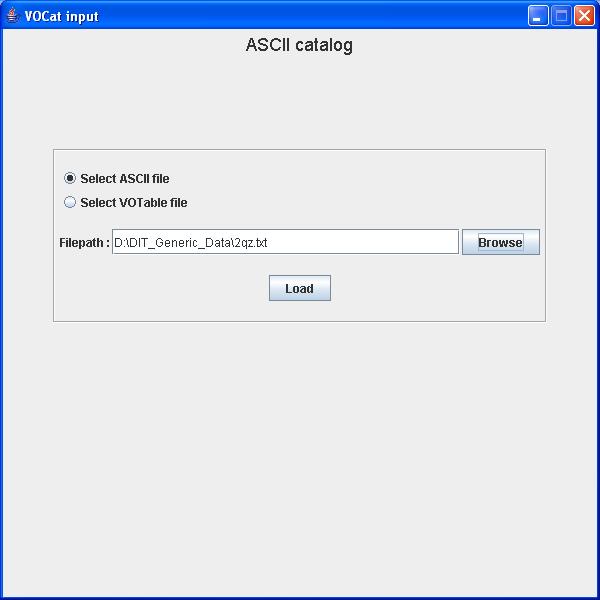
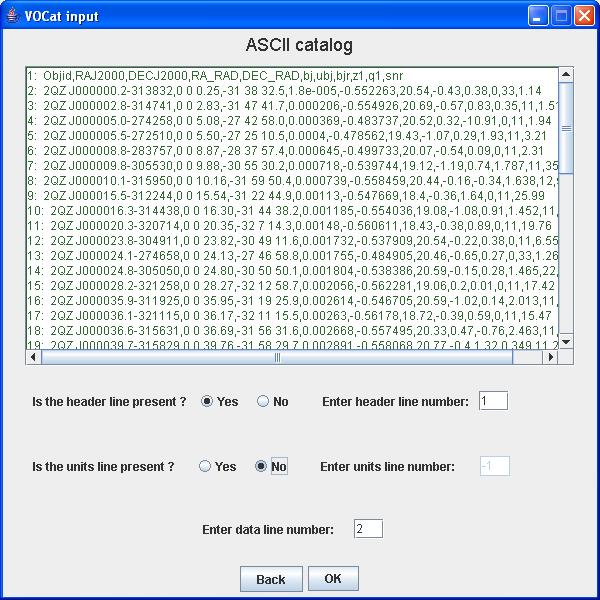
For loading a ASCII file click the "Load ASCII File" menu item from the "File" menu. A file chooser dialog appears where you can select the desired ASCII file from the local file system. Select some ASCII file. On clicking "OK" user is asked for some information before loading the ASCII file
In the first screen user can enter line numbers for header (column names), ucds, datatypes and the line where data starts
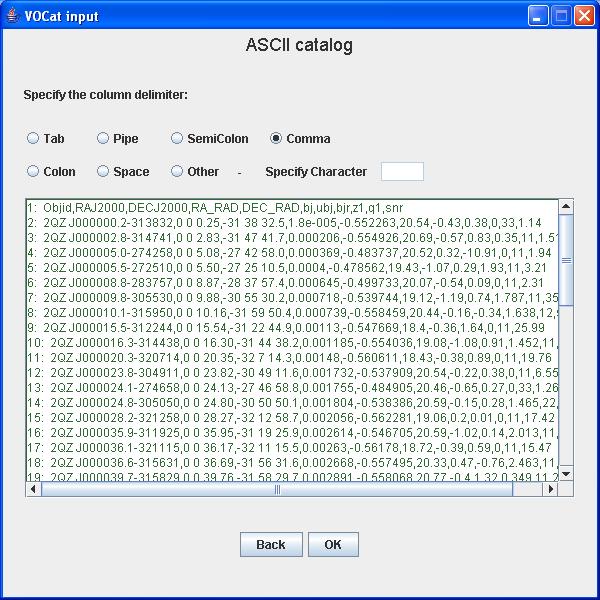
Clicking "OK" would show a screen where a delimiter is selected.
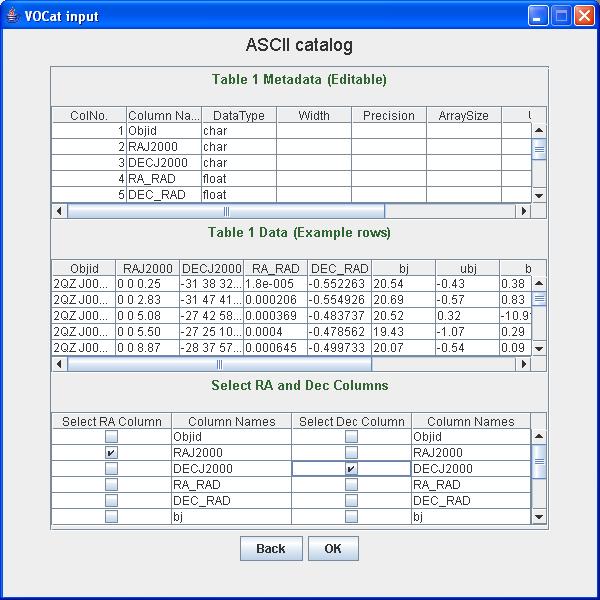
Clicking "OK" would show the meta data and data from the ASCII file. Metadata (Column names, DataType..) shown is editable.
The screen displays three tables in thr scroll pane. First table is an editable table which displays metadata informationabout all columns in the table. Second table is a data table which shows first few rows in the table split into columns. Third table asks user to enter Right Ascension and Declination columns present in the ASCII table.
Clicking OK will open next window where user has to enter database and the table name
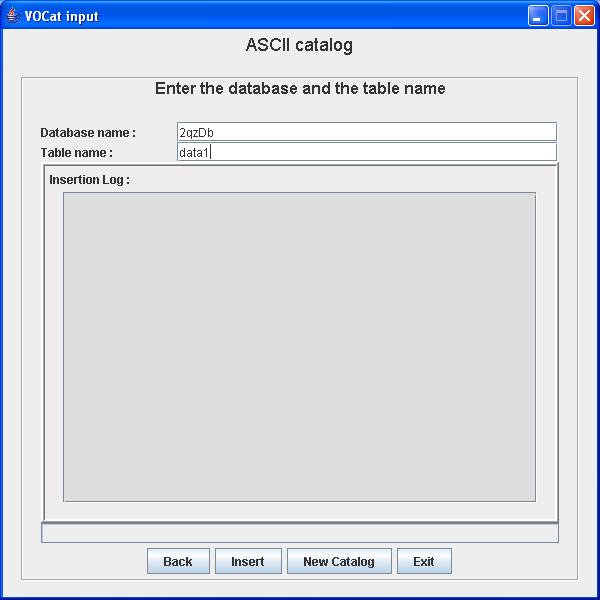
Clicking "Insert " would insert catalog in database, after successfully completion it will prompt the following window
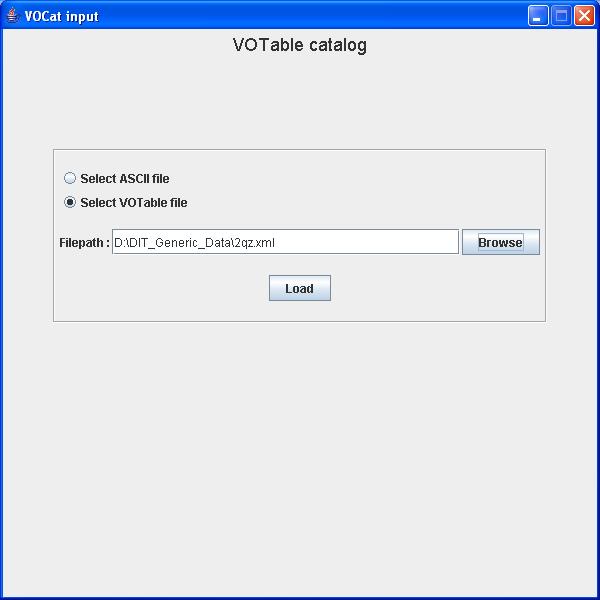
User can insert VOTable table in database by selecting 'Select VOTable file' option
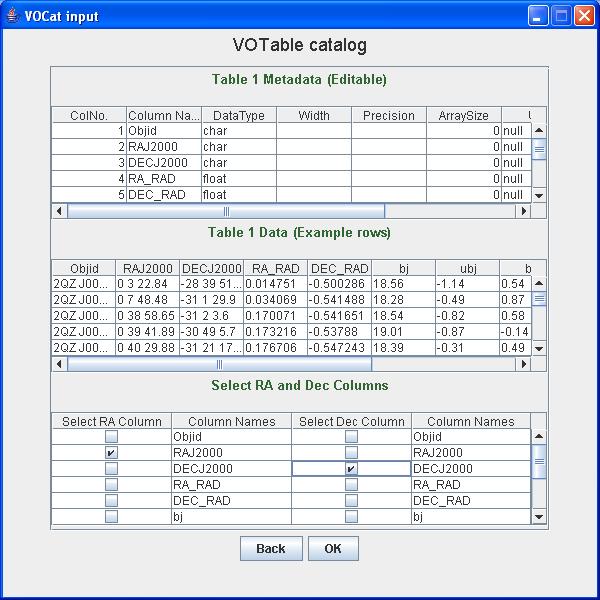
The screen displays three tables in the scroll pane. First table is an editable table which displays metadata information about all columns in the table. Second table is a Data table which shows first few rows in the table split into columns. Third table asks user to enter Right Ascension and Declination columns present in the VOTable file.
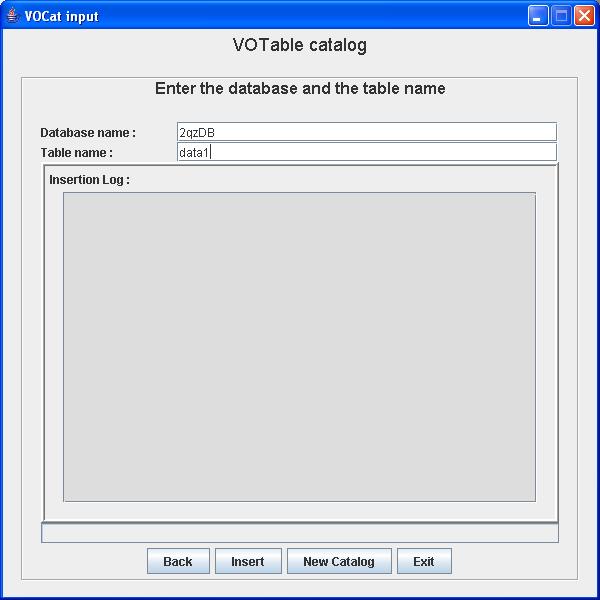
Clicking OK will open next window where user has to enter database and the table name.
There are three ways to launch the view
1. Submit directly without saving the view
2. Create and Launch View
3. Launch from launch button
User can directly submit the query without saving the view by clicking on the ‘Submit' button.
Select metadata from the metadata table
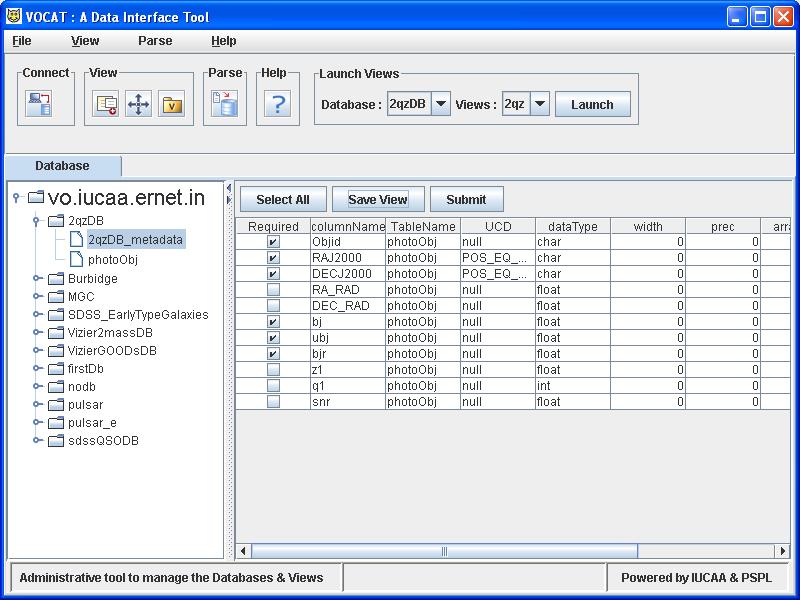
Clicking 'Submit' will open view of that particular databases with selected attributes
Select any database metadata table by clicking on any database in the tree view.
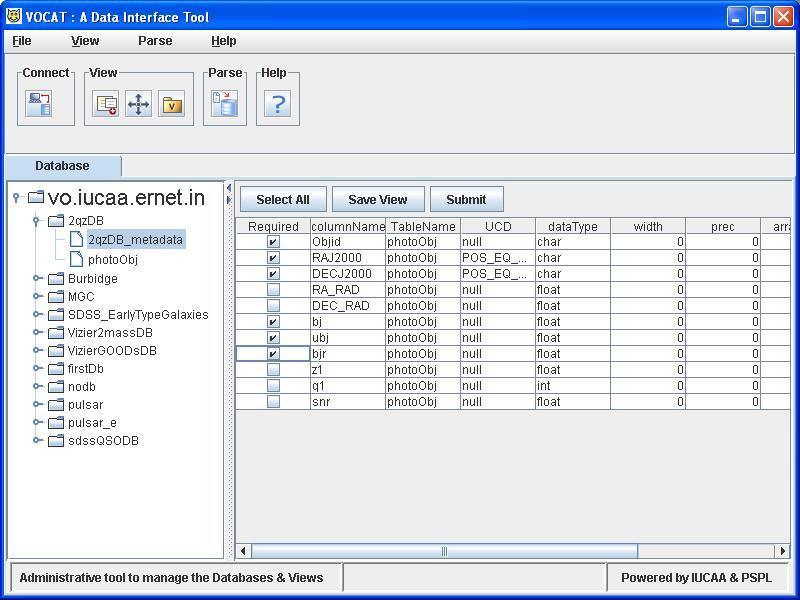
Here user has to select at least one column by clicking on the checkboxes provided in the 'Required column'. After selecting the required columns, the user has to click on 'Save View' button, which will prompt a window and ask the user to enter the view name.
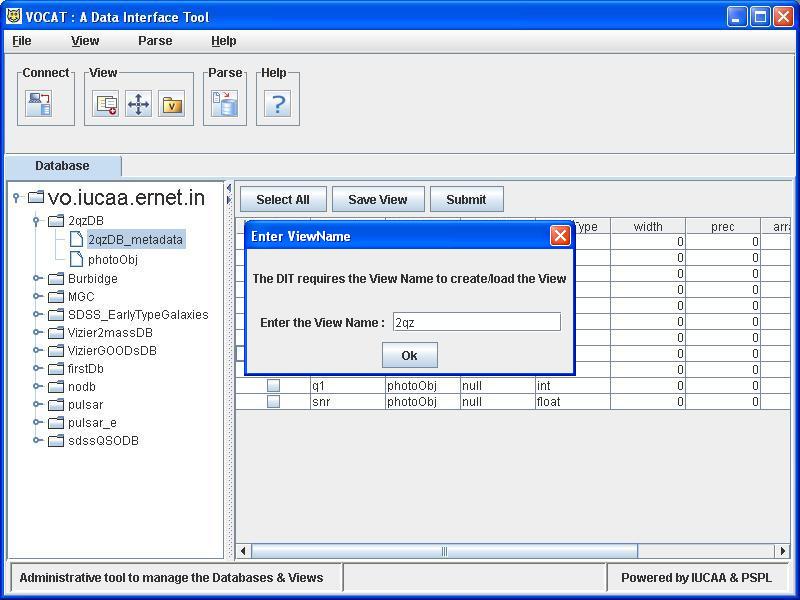
Clicking ‘OK' will prompt another window, which gives user two choices one to launch and other just to save view and create other view.
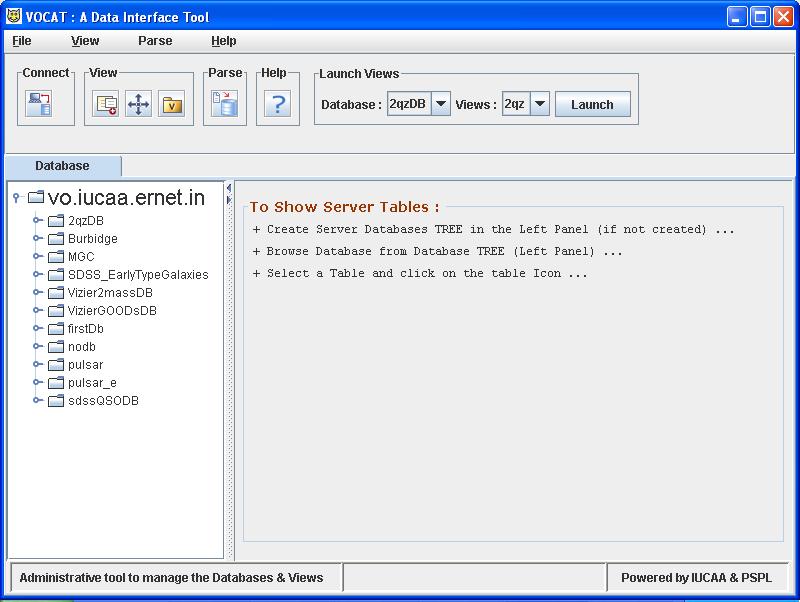
When views are created by user those will be popup in the combo box on the top. Here one combo box gives list of databases having views created And second one gives list of views related to that database. User can select any of the database and corresponding views will be listed out from which one can select any view. Clicking on ‘Launch' button will launch that particular view.
As shown in the following two windows
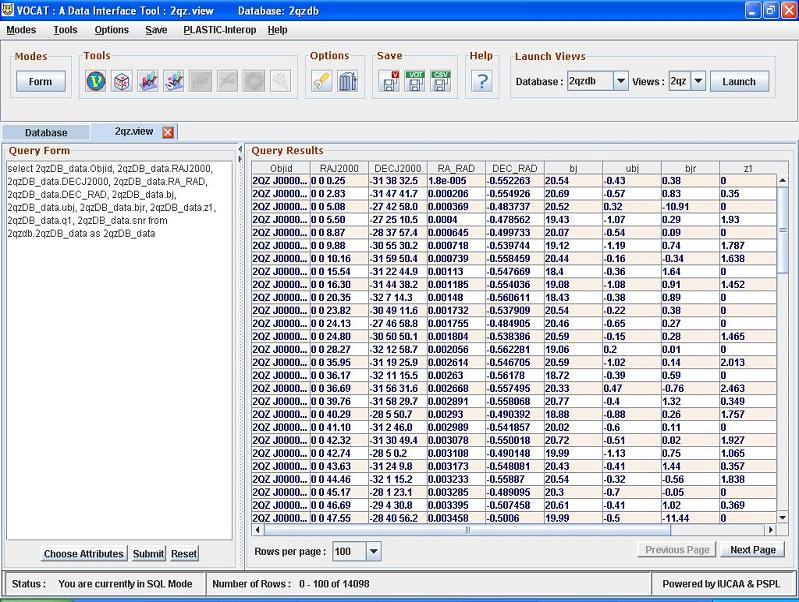
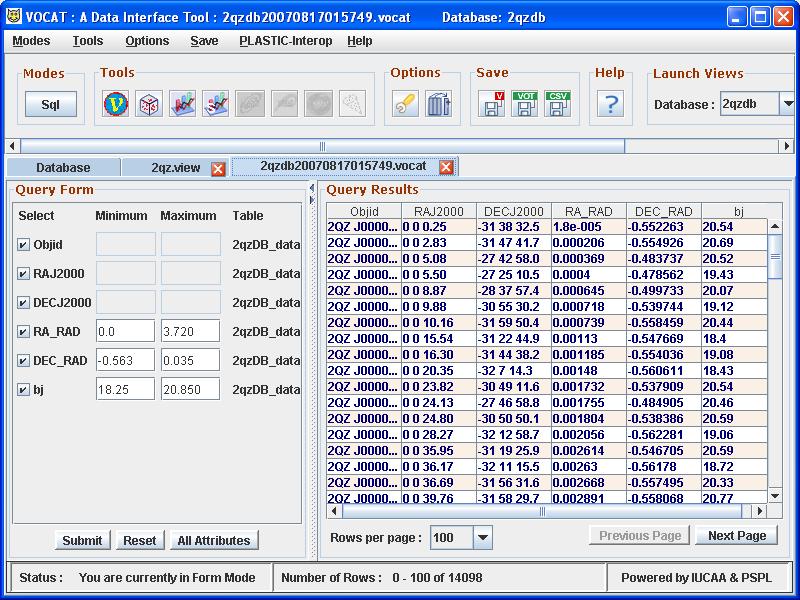
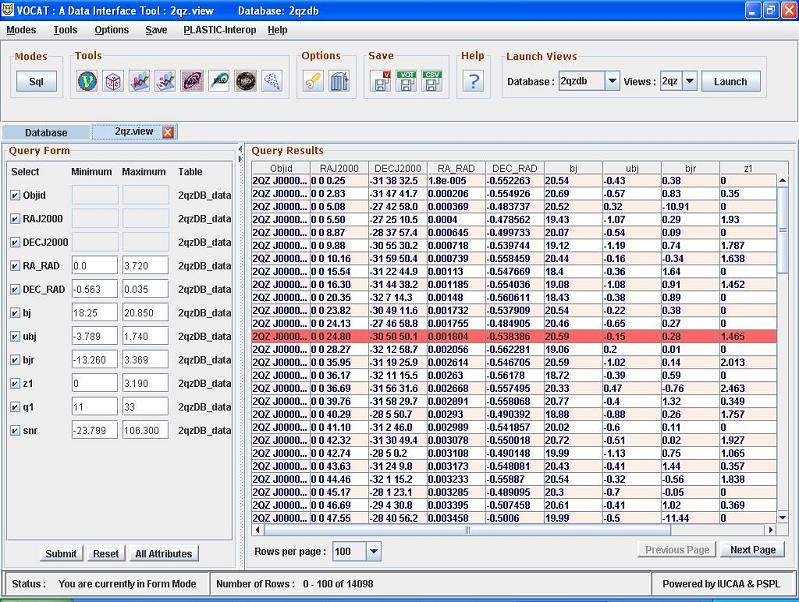
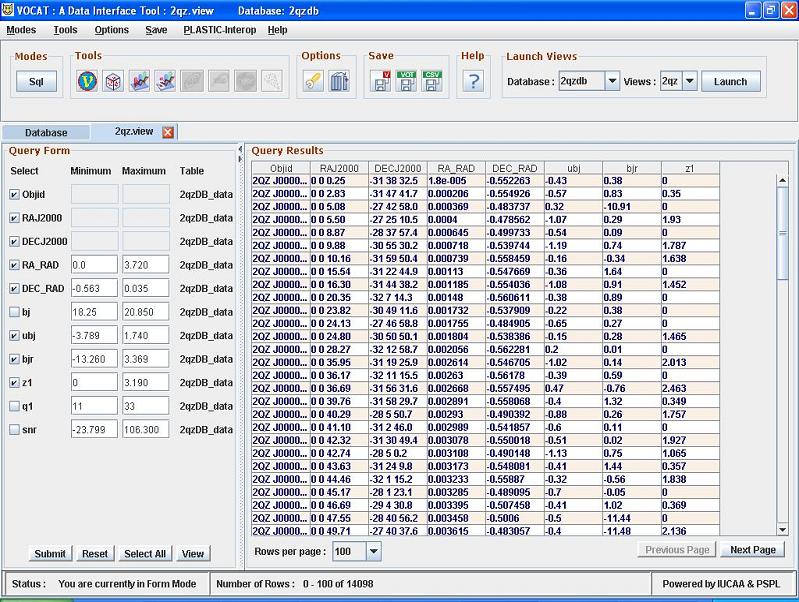
When user launches a view it enters in the View mode as shown in the following fig.

Here two parts of the panel are shown , left part shows ‘Query form‘ and the right pane gives ‘Query Results'
Query Form
‘Submit' button : Submits the query
‘Reset' button: Resets the query in original form
‘All Attributes' button: Changes the mode to All Attributes mode.
Query Results
‘Rows per page' : Number of rows of query results per page can be changed default is 100 rows per page.
‘Next Page' : Clicking on Next page of the result will be displayed
‘Previous Page' : Clicking on Previous page of the result will be displayed
If user is aware of the SQL syntax and wants to form some complicated SQL query, ‘SQL' mode is the option provided
Clicking on ‘SQL' button user can enter in SQL mode

Query Form
Choose Attributes: Window will popup and user can select any attributes to form SQL query
Submit : Submits the Query
Reset : Resets query to
original form.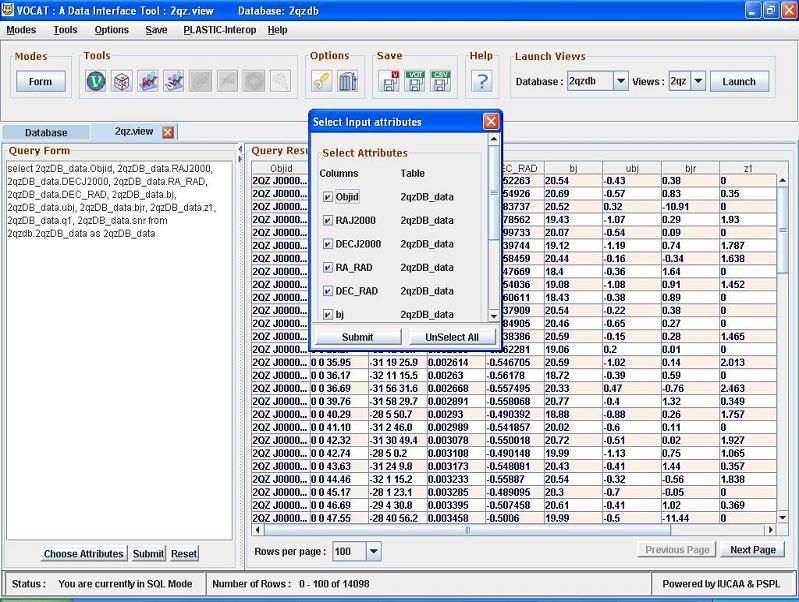
Query Results
‘Rows per page' : Number of rows of query results per page can be changed default is 100 rows per page. ‘Next Page' : Clicking on Next page of the result will be displayed
‘Previous Page' : Clicking on Previous page of the result will be displayed
Here user can view all attributes in the table on the query form and can select any of them for new query formation apart from the attributes saved in the view. Clicking on All Attributes button gives following fig. Query form is changed here.
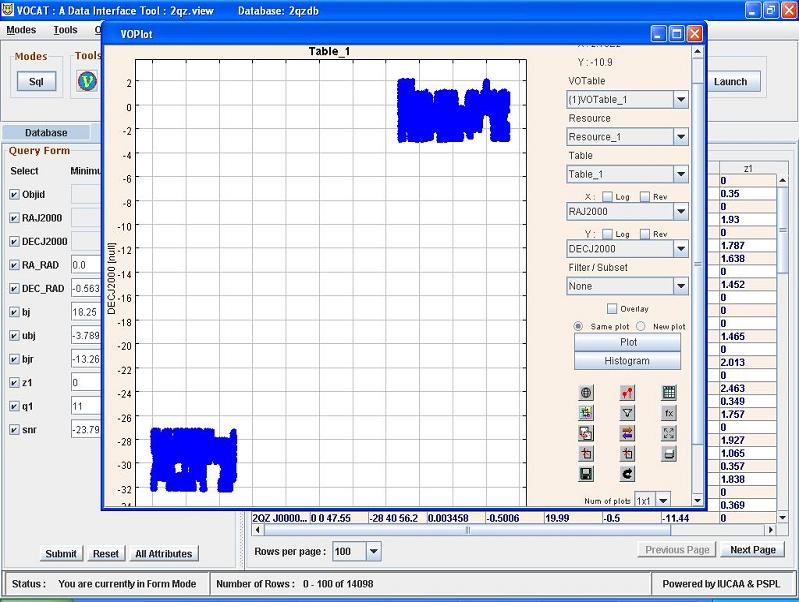
This is the first option in Tools menu Clicking on
![]() this
icon will open VOPlot plotting tool loading query
results.
this
icon will open VOPlot plotting tool loading query
results.
For more information click here
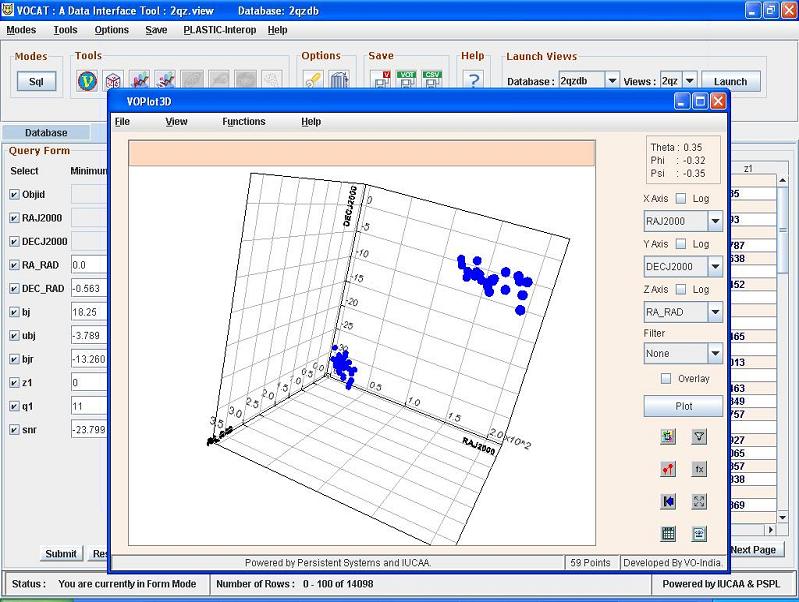
Clicking on
![]() this
icon will open VOPlot 3D, a 3D plotting tool loading query results.
this
icon will open VOPlot 3D, a 3D plotting tool loading query results.
For more information click here
Clicking on this
![]() icon one can launch VOStat web based version , but the only requirement for this
is, machine must have internet connectivity.
icon one can launch VOStat web based version , but the only requirement for this
is, machine must have internet connectivity.
If user wants to use stand alone VOStat which is incorporated in VOCat, Statistical package 'R' should be installed locally.R-2.5.0 or higher version to be installed on local machine.
Clicking on this
![]() icon one can launch VOStat Stand alone version.
icon one can launch VOStat Stand alone version.
Note: Following tools require Internet connection
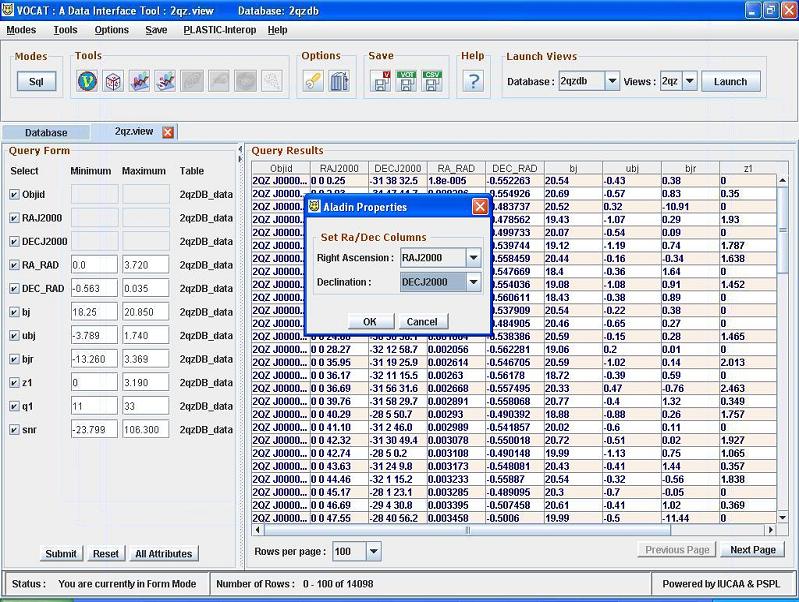
This icon will be enabled when user select any row in the results as it takes
point source as input. Clicking on
![]() this icon will open tool called Aladin. Before
opening aladin
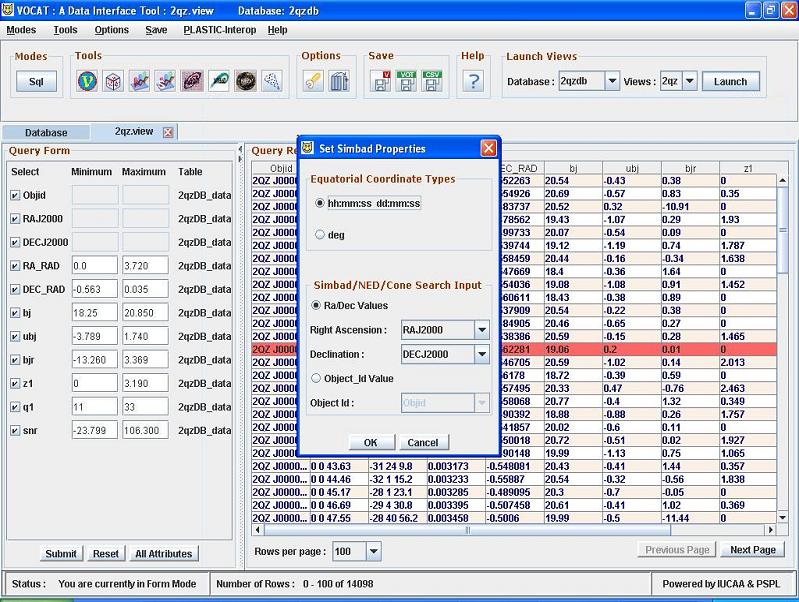
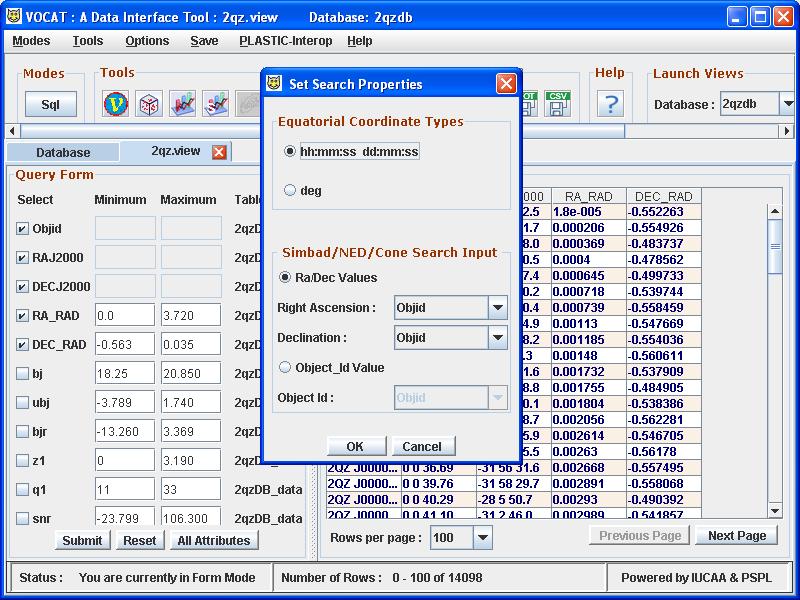
user has to set input co-ordinate types which can be done in the popup
window.
this icon will open tool called Aladin. Before
opening aladin
user has to set input co-ordinate types which can be done in the popup
window.
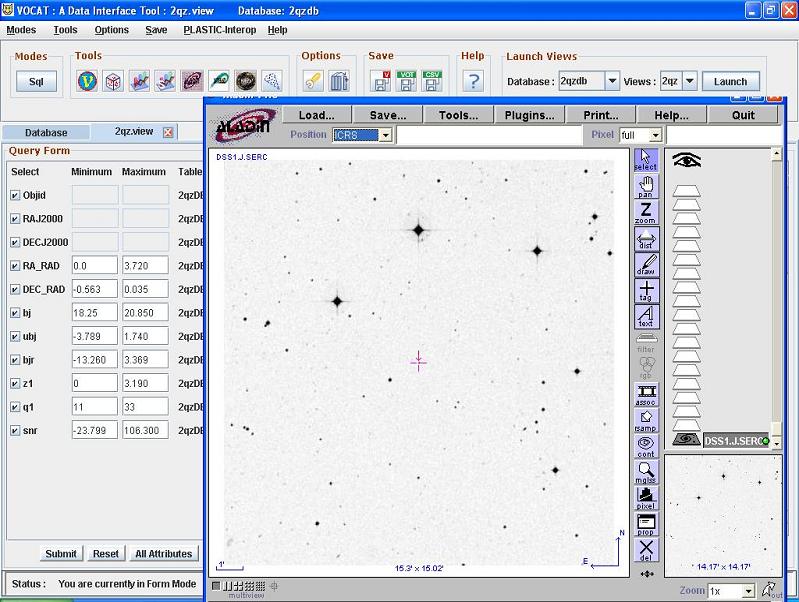
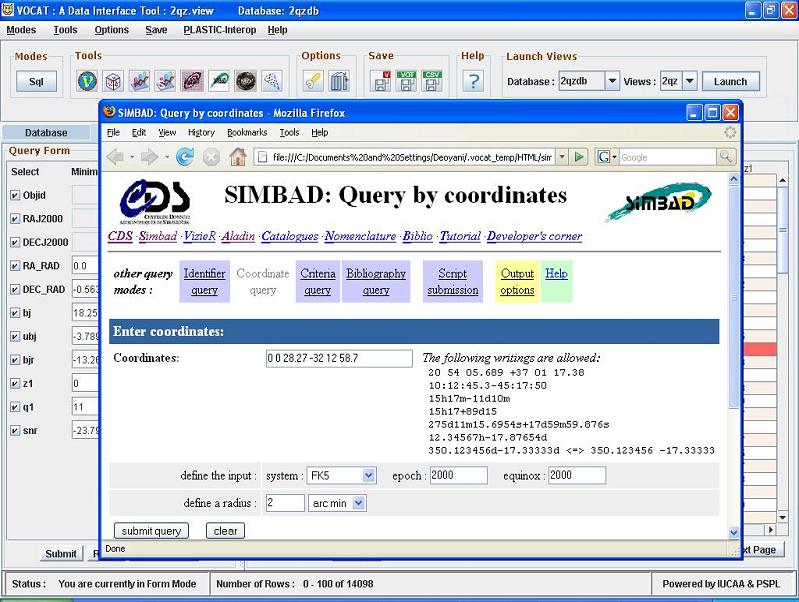
This icon will be enabled when user select any row in the results as it takes
point source as input Clicking on this
icon
![]() ,
will open up browser connect to Simbad query form.
,
will open up browser connect to Simbad query form.
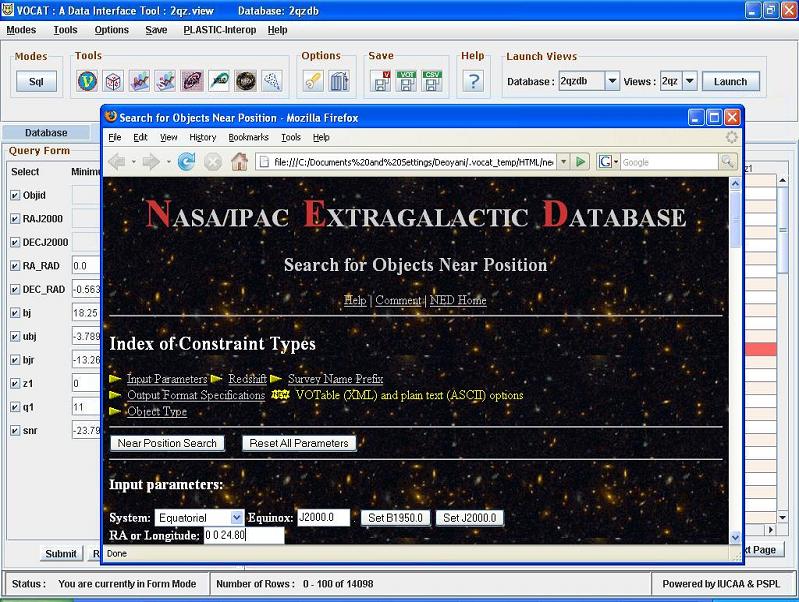
This icon will get enabled when user select any row in the results as it
takes point source as input. Clicking on this
icon
,
will open up browser, connect to NASA extragalactic database near position
search query form.
This icon will be enabled when user selects any row in the results as it
takes point source as input Clicking on
![]() this icon ,
will open a new window
displaying a registry which will list out
available cone search services.
this icon ,
will open a new window
displaying a registry which will list out
available cone search services.
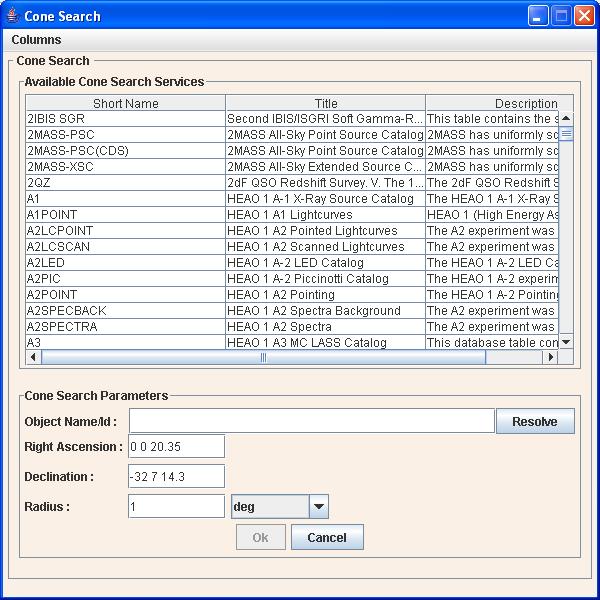
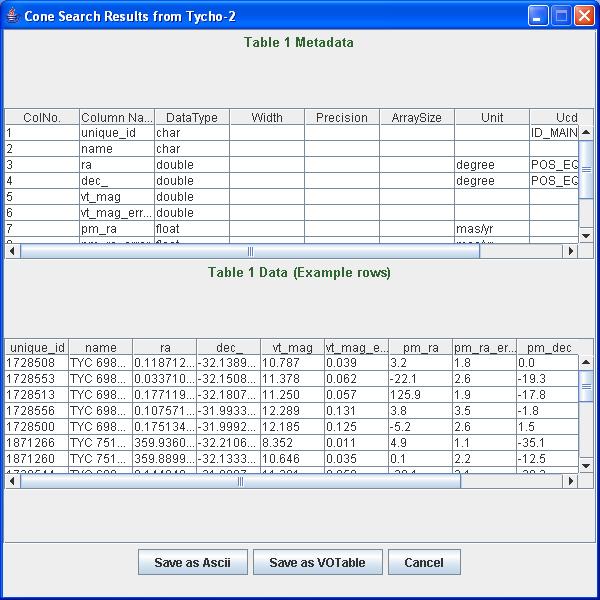
After selection of a service the submit button will be enabled clicking on it will give the cone search results.
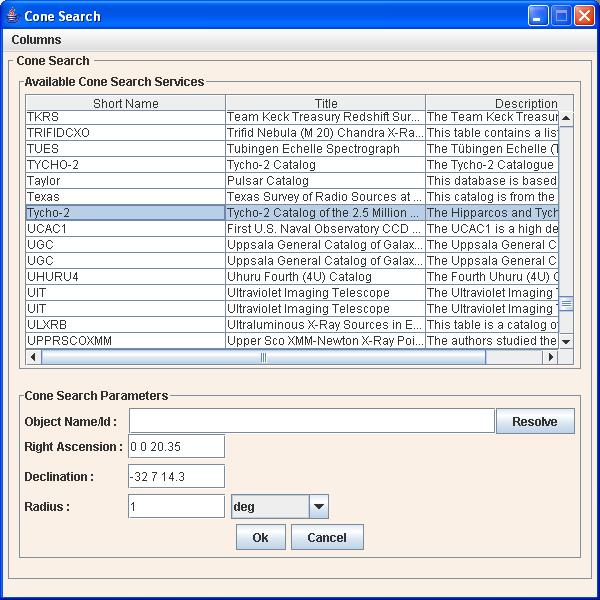
Cone Search Results
For more information about conesearch click here
Clicking on
![]() this icon user can set different parameters for search tools available in VOCat.
this icon user can set different parameters for search tools available in VOCat.
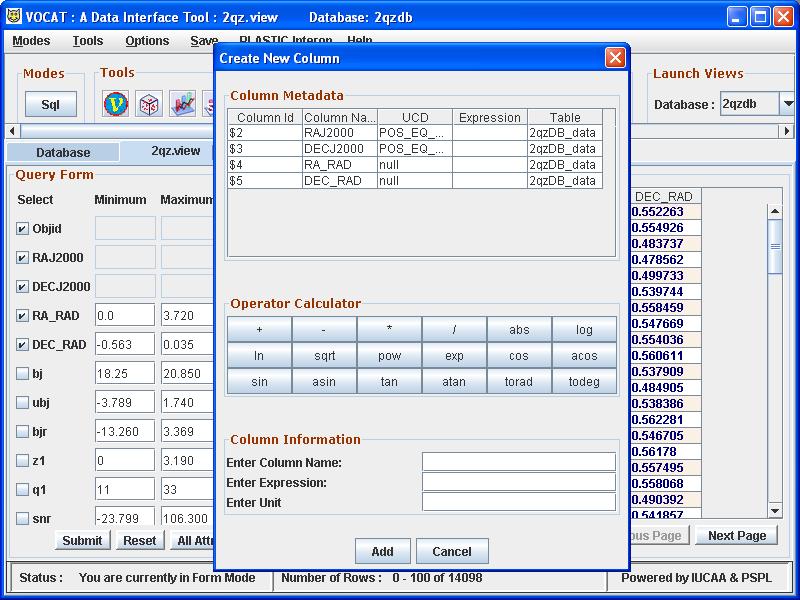
User can create new column in the table using existing columns with some user defined expressions
clicking on this![]() Icon you will get following window to create new column
Icon you will get following window to create new column
Clicking on this
![]() ,
one can save the view with the changes in attributes made and query limits.
,
one can save the view with the changes in attributes made and query limits.
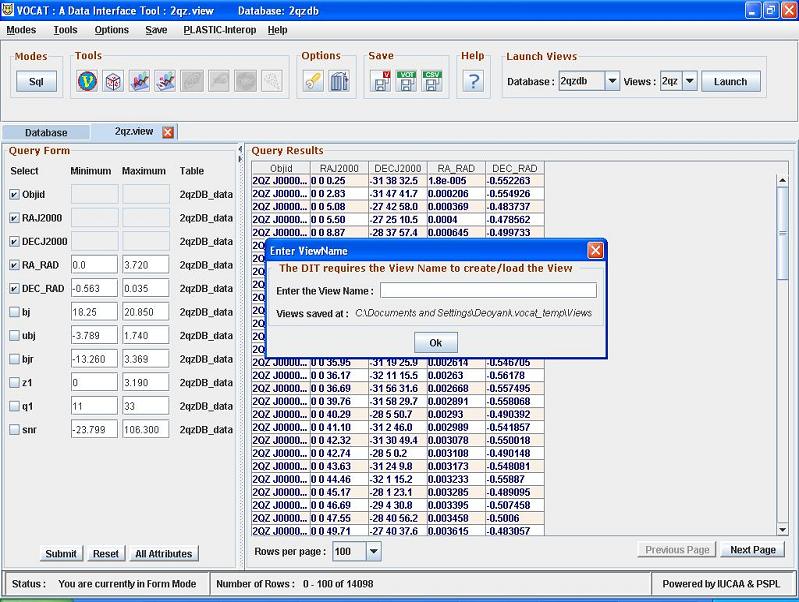
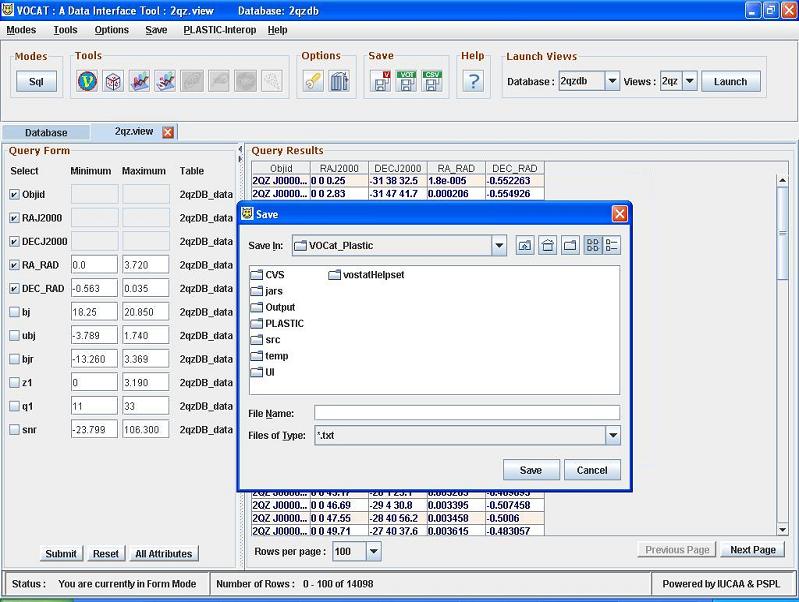
Clicking on this![]() , query results can be saved in the comma seperated ASCII format.
, query results can be saved in the comma seperated ASCII format.
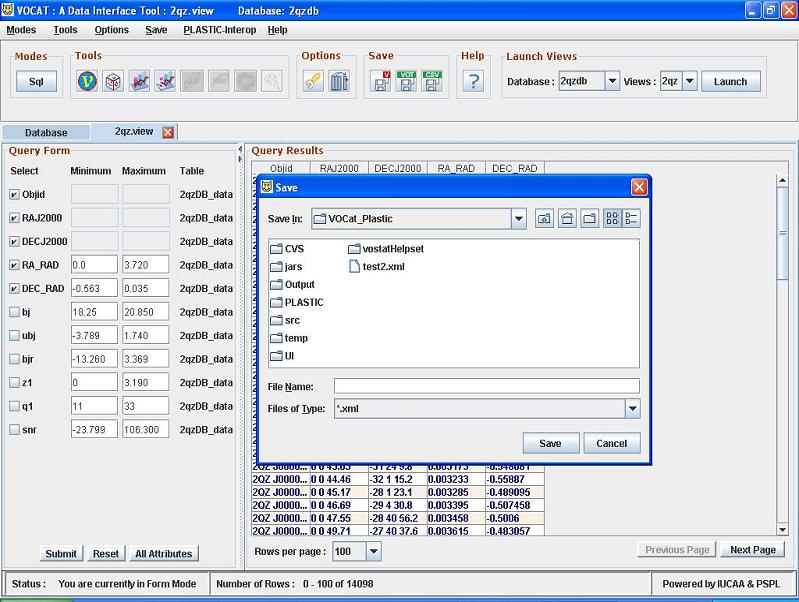
Clicking on this
![]() ,
query results can be saved in the VOTable/xml format.
,
query results can be saved in the VOTable/xml format.
Please Note:
For deleting a database in MySQL, the root user has to do the following:
1) Get the 'mysql' prompt by typing
a) mysql
OR
b) mysql -u root -p password
2) Then at the MySQL prompt, type
drop database <database name>
eg: drop database mydb;
Features in VOCat_1_0_Beta Version (Release on 17 Aug. 2007):
1.VOPlot
2.VOPlot3D
3.VOStat (Stand Alone and Web Based)
4. Aladin
5. SIMBAD
6. NED
VOCat connects to SIMBAD and Aladin which were developed by CDS and NASA/IPAC Extragalactic Database (NED). Our 'Cone Search' utility is based on idea from TOPCAT.
We would be happy to receive any feedback/comments on VOCat. For feedback and comments please contact voindia@vo.iucaa.ernet.in.